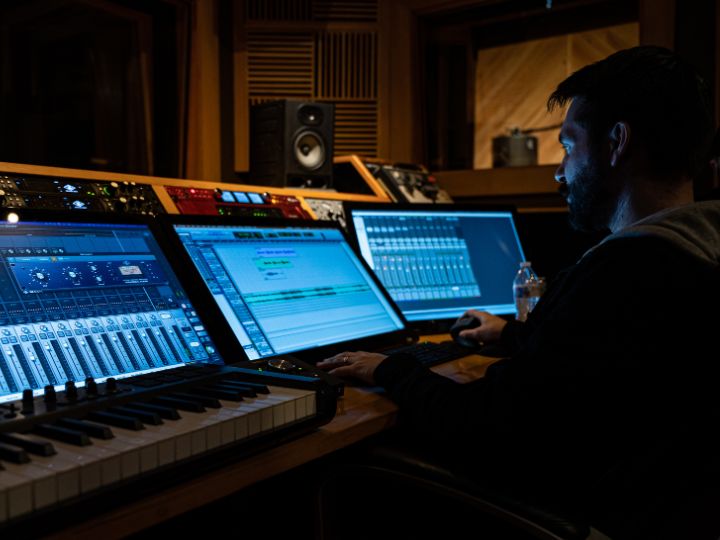
Ultimate Guide To Mixing And Mastering For Professional Audio Production
 March 27, 2025

Introduction
In the professional sound industry, it is often in the mixing and mastering where an amateur track transforms into a radio-ready song. Whether you are an independent artist, a producer, or someone who wants to improve sonic quality through record-making or find commentaries on any of these, you must familiarize yourself with these processes. For instance, music production houses in India and worldwide usually house engineers who, through post-production, are skilled in refining raw recordings to perfect masterpieces. This guide delineates the essentials in mixing and mastering to realize professional sound.Understanding Mixing And Mastering

What Is Mixing?
Blending tracks is the process of creating a cohesive and well-balanced song. This depends on adjustments of levels, panning, EQ, compression, reverb, or other effects so that everything fits perfectly in the mix.What Is Mastering?
Mixing and mastering services are crucial in professional audio production. Mastering is the last step, where an audio engineer fine-tunes the mixed track to guarantee its quality across several playback systems. Enhancements are made on clarity, volume, and tonal balance, plus preparing the track for introduction across various platformsThe Essential Steps In Mixing

1: Organizing Your Session
A well-organized session provides the foundation for an efficient and fruitful mixing. Label all tracks and group similar elements (eg, drums, vocals, instruments)- color-coded for effective navigation.2: Gain Staging
It is a very important thing because no element features in the mix that is loud or quiet. Monitoring levels ensures that unwanted distortion is prevented and also leaves enough headroom for processing.3: EQ (Equalization)
Each track is shaped with tonal balance with the help of EQ. Cutting the unnecessary frequencies and boosting the essential ones is what makes for good cohesiveness with instruments. For example:- Roll off low-end rumble in vocals and guitars.
- Add a small boost (about 3-5 kHz) for vocal presence.
- Remove muddy frequencies from overlapping instruments (200-500 Hz).
4: Compression
The compression controls the sound's dynamic range so that it stays consistent and punchy. It is very helpful when compressing vocals, drums, and bass. Try using light compression on the vocals to let them finish the performance smoothly. Doing parallel compression on the drums will give them some push without losing dynamics. Side-chaining will keep the kick pronounced in the mix.5: Panning And Stereo Imaging
Panning widens and spaces the mix. Elements will be strategically placed in the stereo field to create depth.- Center the key elements - kick, bass, and lead vocals.
- Pan everything else - backing vocals, guitars, and percussion - out to create a sense of stereo width.
- Use stereo enhancers very carefully so that you retain an element of natural phase coherence.
6: Reverb And Delay
- Reverb and delay create depth and dimension.
- Use short plate reverb on vocals to add some warmth.
- A subtle slapback delay can give the vocals a fuller sound.
- Long lush reverbs would suit ambient pads and synths very well.
7: Automation
Automation is a great way to help with movement in a mix.- Automate the vocal levels for a live feel.
- Another way to differentiate the multiple sections is to automate the reverb and delay tails.
- Depending on the intensity, bring the instruments in and out of the mix.
8: Mixing For Different Genres
Different genres will require different approaches to mixing. Here are a few tips:- Pop music: Consider clear vocals, tight drums, and lots of polish.
- Rock music: Focus on drums with power and guitar layers that are well-balanced.
- Hip Hop: One should consider deep bass and punchy vocals.
9: Electronic Music
Bass-heavy sounds with side-chained synths make for a commonly identified sound.The Essential Steps In Mastering

-
Preparing The Mix For Mastering
-
Equalization
-
Compression And Multiband Compression
- Use general compression (1-2dB of gain reduction) for smooth results.
- Multiband compression allows control over specific frequency ranges.
-
Saturation And Harmonic Exciters
-
Stereo Enhancement
-
Limiting
-
Final Checks
Advanced Mixing And Mastering Techniques

-
Reference Tracks
-
Mid/Side Processing
-
Dynamic EQ
-
Analog Summing
-
Loudness Normalization For Streaming
Recommended Tools For Mixing And Mastering

DAWs
- Ableton Live
- FL Studio
- Pro Tools
- Logic Pro X
- Cubase
Mixing Plugins
- FabFilter Pro-Q 3 (EQ)
- Waves SSL Channel Strip (Channel Strip)
- UAD LA-2A (Compression)
- Soundtoys EchoBoy (Delay)
- Valhalla VintageVerb (Reverb)
Mastering Plugins
- iZotope Ozone (All-in-one Mastering Suite)
- FabFilter Pro-L 2 (Limiter)
- Brainworx bx_digital V3 (Mid/Side EQ)
- Waves L2 Ultramaximizer (Loudness Maximization)
End Note
Mixing and mastering are technical and creative processes that convert raw recordings into polished tracks with professional sound. A few best practices will enhance your music production service, whether you work in a post-production studio or an independent setup. While many music production companies in India provide excellent services in professional audio, knowing the basics allows you to refine your work and bring your creative vision to fruition. Ready to take your tracks to the next level? Open your DAW, experiment with these techniques, and craft a professional mix with confidence!Latest Blog Posts
Have an idea?
Let’s Talk.!
We create experiences that fuel connections between brands and the people vital to their success.
Contact Us


